¶ Overview
This document guides you through the processes of downloading and running this release package.
¶ Hardware Requirements
The hardware requirements for using this release package are as follows:
Supported boards:
- cool pi 4 model b (4G/8G/16G/32G)
¶ Working with cool pi 4b
¶ Board hardware
The figure below shows the different components of the 4b board.

Note: power input DC 12V/2A or 5V/4A (type-c power input not support pd)
¶ Serial console
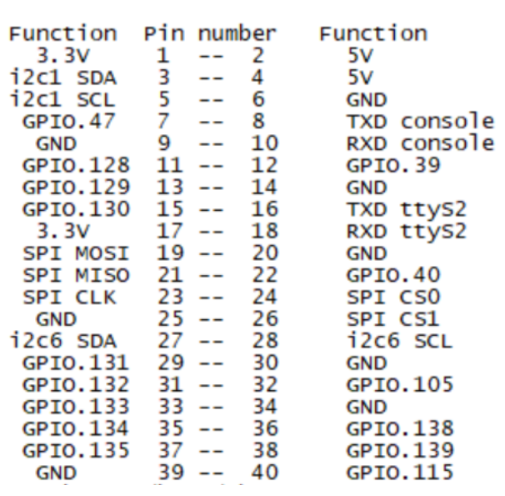
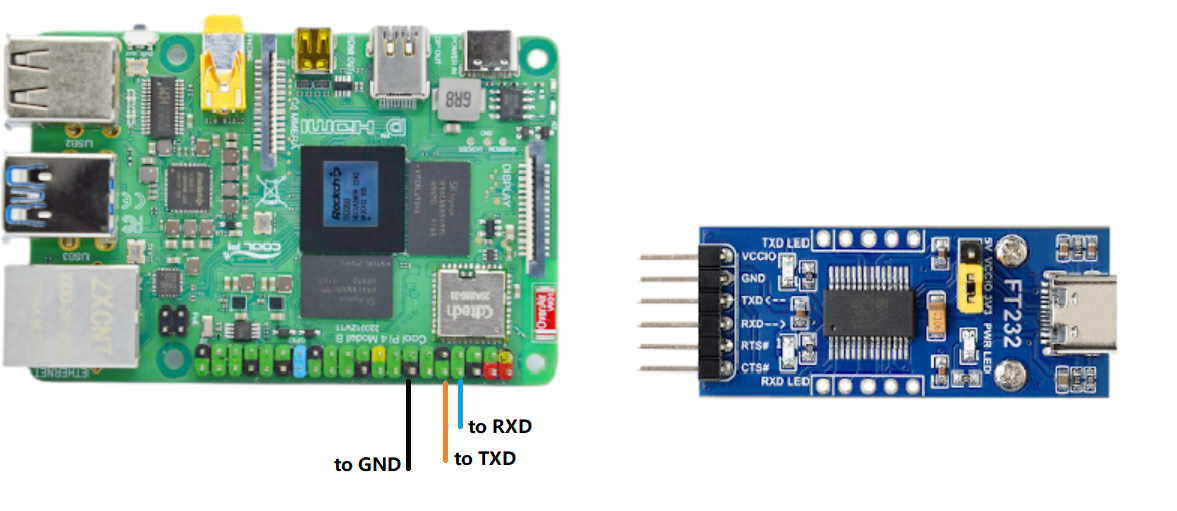
UART serial port on the GPIO header on pins 8, TXD and 10, RXD. The UART port can connect to a wide range of devices directly using 3.3V UART pins. The list of gpio default functions is as follows.
¶ serial parameters
- Baud rate: 115200
- Data bit: 8
- Stop bit: 1
- Parity check: none
- Flow control: none
¶ Board firmwares
The table below describes the locations of the software images in onedrive or 百度网盘
| image name | path | download tool |
|---|---|---|
| RKDevTool_Release_v2.92_loader0411.zip | CoolPi 4B/loader/ | windows RKDevTool(need install DriverAssitant_v5.12.zip prefer) |
| Cool Pi 4B Ubuntu22 20230306 System Install.iso | CoolPi 4B/udisk install/ | windows rufus-3.21.exe |
| 20230306-ubuntu-22.04-preinstalled-desktop-arm64-coolpi.zip | CoolPi 4B/ubuntu/ | windows balenaEtcher |
| 20230115-ubuntu-20.04-preinstall-server-arm64-coolpi.zip | CoolPi 4B/ubuntu/ | windows balenaEtcher |
¶ Flashing board images
The board images can be flashed to the target spi flash and emmc by using the RKDevTool and balenaEtcher. User can also install the system through a installation u disk with rufus tool.
¶ How to install loader
In general, user do not have to upgrade the default loader.
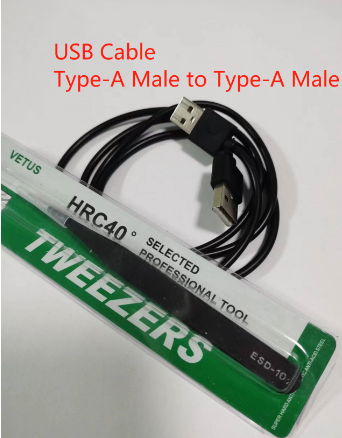
Tools need to be prepared:
¶ step1
Install DriverAssitant_v5.12.zip with Windows 7/10/11.
Uncompress file RKDevTool_Release_v2.92_loader0411.zip.
¶ step2
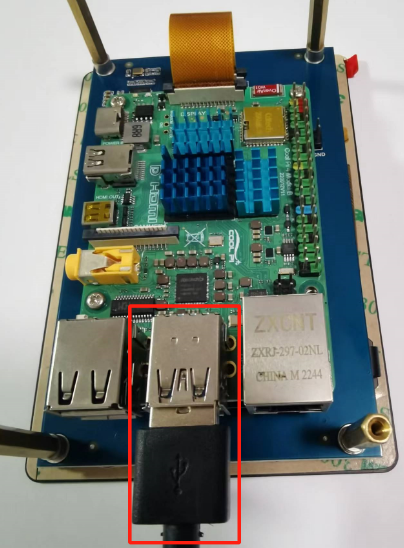
Plug in the USB cable and connect to the computer.
¶ step3
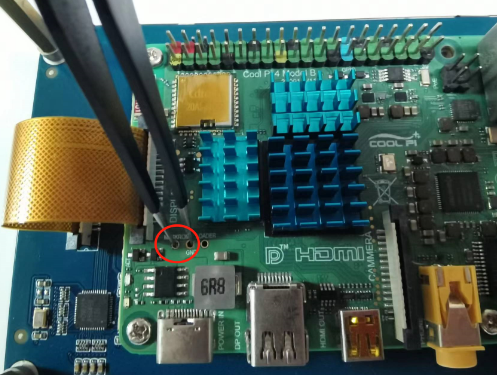
Short circuit this position with tweezers.
¶ step4
Reconnect the typec power supply and power on.
¶ step5
Execute firmware program writing.


¶ How to install system
¶ use balenaEtcher with TF-Card Reader or eMMC online
Plug in the power and press the power button at least three times, and the machine will enter UMS mode.

¶ use rufus with USB-disk
Download system iso file, then run the tool that makes the boot USB stick.
Example: Image file name coolpi-sdcard.img
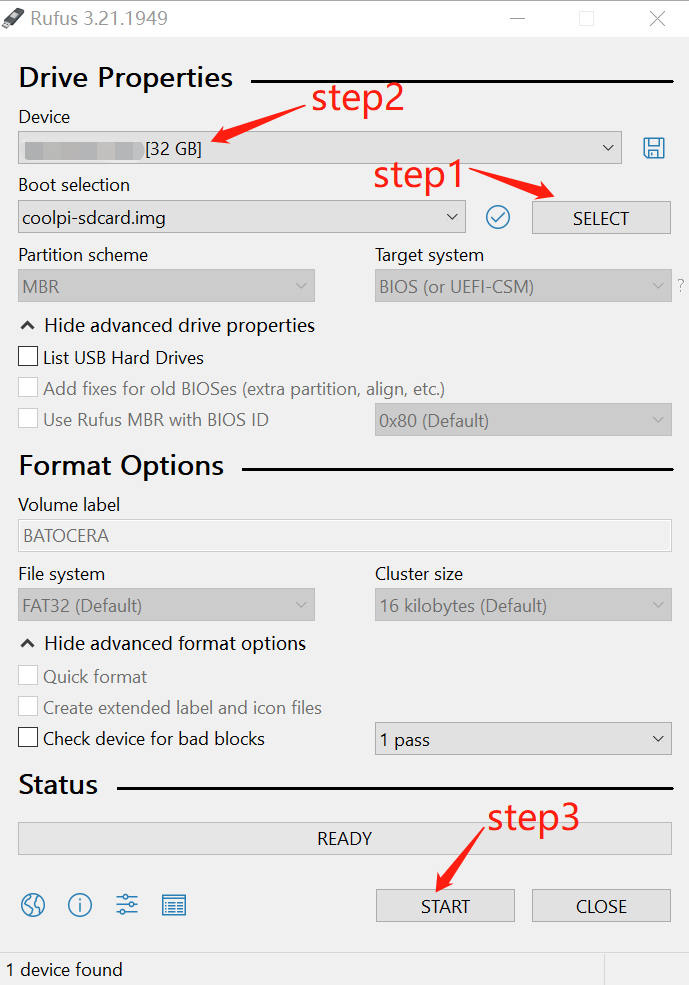
Insert the USB stick into the blue USB3.0 port (the lower one) of 4b board, then power up and wait for automatic installation to complete. User can view installation status via serial port or hdmi out display.
¶ backup system
Download system backup iso file 'Cool Pi 4B Backup 20230329.iso', make a new boot usb stick. The operation steps are the same as the installation step.
When the backup is complete, the backup directory will be created in the root directory of the udisk.
Copy the backup directory to the installation udisk, rename it as the install directory, user can deploy the backup system with this udisk.